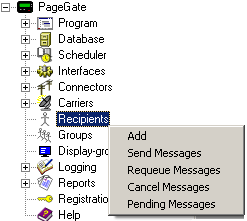
Setting
|
Function
|
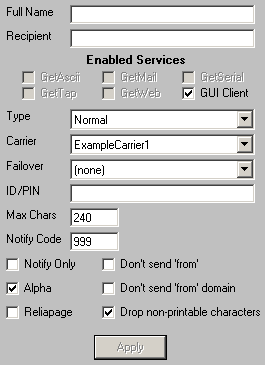
Full Name
|
This field is what is displayed in the GUI Client and paging websites.
|
Recipient
|
This field is only referenced internally by the program. In the GetAscii module, for example, it is the Recipient field NOT the Full Name field that is referenced for messaging purposes.
|
Enabled Services
|
The list of PageGate modules that are enabled and available are listed here. Modules that are not highlighted are not available. Modules not checked are not enabled for this recipient. For example, if the GetAscii module isn't enabled for your recipient, the GetAscii module will not be able to send this recipient any messages.
If an Interface is not available and it should be, please make sure that the Interface is enabled both in the Program Settings and in the Interface Settings.
|
Type
|
Typically, this field should be set to Normal. There are, however, four options that can be set. Please see the Recipient Type section of the manual for more information.
|
Carrier
|
This field can only be set to a carrier within the PageGate Admin. This field should be set to the carrier this recipient is tied to. For example, if you are trying to contact a Nextel device, you would need to create a Carrier called Nextel, then set this Recipient's carrier to Nextel.
|
Failover
|
If a message is not able to be delivered to this recipient, the message will be automatically redirected to whatever recipient you specify here.
|
ID/PIN or Email To
|
Enter the ID, PIN, or Email address of the pager, cel phone, wireless device, or email account to be contacted.
|
Max Chars
|
The number of characters PageGate will send to this recipient from a message. If this number is greater than the Max Characters setting for the carrier, the message will be broken up into multiple messages (according to the carrier's max character settings), numbered, and sent
|
Notify Code
|
The numeric value sent by the "Notify Only" option in lieu of any message.
|
Notify Only
|
Enable this option only if you wish the recipient to receive the 'Notify Code' (above) rather than the actual message. This setting is commonly used with numeric pagers
|
Don't send 'from'
|
Enabling this option will prevent PageGate from sending the sender's name (the 'from' field) at the beginning of each message.
|
Alpha
|
This option should be enabled for alphanumeric Recipients and disabled for Numeric Only Recipients.
|
Don't send 'from' domain
|
Enabling this option will remove the domain name portion of a sender's address from messages queued for this recipient. This is typically used to save available characters for the message.
|
Reliapage
|
When this option is enabled, PageGate will sequentially number each message it sends to recipient. This is useful for detecting if a message has been missed (a number is missing). Messages then can be re-sent by using the 'Requeue' function
|
Drop non-printable characters
|
Many pagers don't accept characters like carriage returns, line feeds, and tabs. Enable this option to have PageGate automatically remove this characters from any queued message for this recipient..
|
Apply
|
Apply saves all recently made changes to a recipient's settings.
|

