The UCP protocol configures this carrier to use a dial-up modem to transmit messages.
Note: Be sure to set the COM port of the device in the Connection Settings.
| 1) | Select the UCP protocol. |
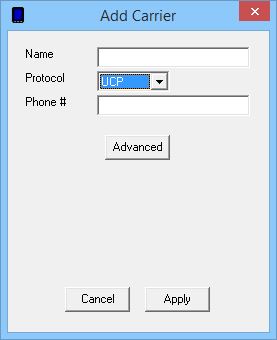
| 2) | Give the Carrier a name. |
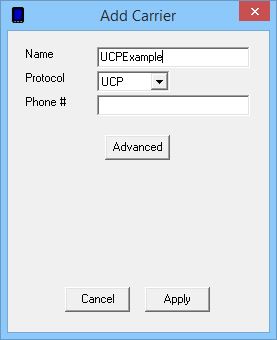
| 3) | Enter the UCP terminal phone number of the destination carrier. |

| 4) | Click on the Advanced button. |
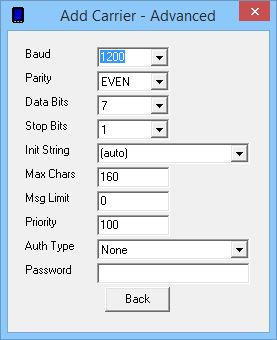
| 5) | Specify the Baud Rate, Parity, Data Bits and Stop Bits required by the receiving UCP system. |
| 6) | If you are familiar with the AT command set of your modem and know the proper initialization string to use, enter it in to the Init String field or select it from the dropdown list. Otherwise, leave this field set to (auto). |
| 7) | Leave the Max Chars value at 160. |
| 8) | The Msg Limit specifies how many messages should be sent in a single session before NotePager Pro disconnects from the receiving UCP system, then reconnects to send any remaining messages. |
| 9) | Set the Priority of the carrier. This can be set to a value from 1 to 100, with 1 representing the highest priority. The default value all carriers and recipients is 100, however, numbers larger than 100 can be used. |
| 10) | If the UCP system you are connecting to requires authentication, select Standard from the Auth Type dropdown list and enter the required authentication credentials in the password field. |
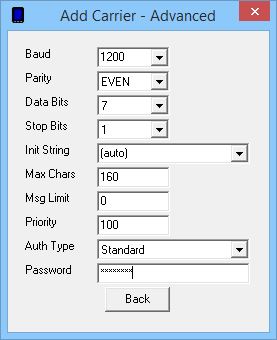
| 11) | Click on Back. |
| 12) | Click on Apply. |
| 13) | Click on OK. |