To begin the process of registering on FirstNet, you'll want to contact your AT&T representative or go to https://www.firstnet.com/signup/decision
Unlike other message delivery services, FirstNet does not whitelist the sender and requires that the sender submit a list of specific numbers to message.
Put another way, gather all of the phone numbers you want to messages as you'll need to submit them to FirstNet for whitelisting. If you try to send to a number that is not whitelisted with FirstNet, their hosts will not accept the traffic.
FirstNet supports receiving messages by WCTP, SNPP and SMTP. With all three, we can configure a failover system where the program will use the best method of delivery (WCTP) first, then fail over to the second best (SNPP) and if that fails, it makes a last ditch attempt to send it out via email (SMTP).
Special Notes:
•Port 443 will need to be open for WCTP.
•Port 444 will need to be open for SNPP.
•To configure the SMTP failover, you will need to know your SMTP server address, port to connect on and required authentication credentials.
Step 1: Configure FirstNet-PRIMARY as a delivery method
1)Run PG Admin.
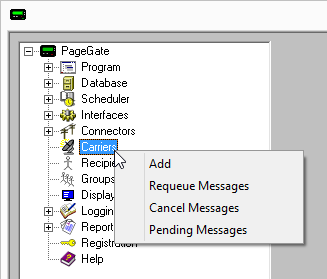
2)Right click Carriers, select Add
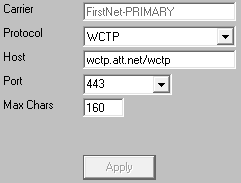
3)Specify the following:
Carrier: FirstNet-PRIMARY Protocol: WCTP Host: wctp.att.net/wctp Port: 443 Max Chars: 160 |
|
4)Click Apply.
Step 2: Configure FirstNet-SECONDARY as a delivery method
1)Right click Carriers, select Add
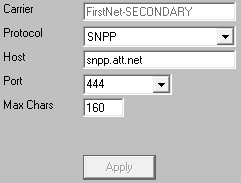
2)Specify the following:
Carrier: FirstNet-SECONDARY Protocol: SNPP Host: snpp.att.net Port: 444 Max Chars: 160 |
|
3)Click Apply
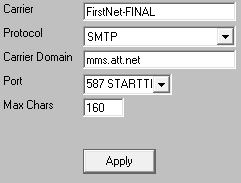
Step 3: Configure FirstNet-FINAL as a delivery method
1)Right click Carriers, select Add
2)Specify the following:
Carrier: EMAG-FINAL Protocol: SMTP Host: mms.att.net Port: Specify the port required by your SMTP server. Max Chars: 160 |
|
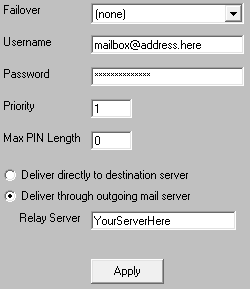
3)Go to Carriers - EMAG-FINAL - Advanced
4)Specify the following:
Select the 'Deliver through outgoing mail server' option and enter your SMTP server address in the 'Relay Server' field.
For example, if you use Office365, you would use smtp.office365.com as the relay server address.
Specify the required username and password.
Priority: See Prioritizing Messages |
|
5)Click Apply
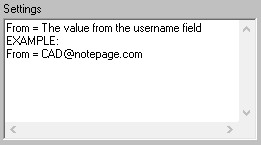
6)Go to Carriers - FirstNet-FINAL - Template
7)Specify the following in the 'Settings' section:
From = The value from the username field EXAMPLE: From = CAD@notepage.com |
|
8)Click Apply.
Step 4: Configure the failover system
1)Go to Carriers - FirstNet-PRIMARY - Advanced
2)Click the dropdown arrow next to 'Failover' and select: FirstNet-SECONDARY
3)Click Apply
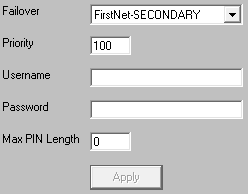
4)Go to Carriers - FirstNet-SECONDARY - Advanced
5)Click the dropdown arrow next to 'Failover' and select: FirstNet-FINAL
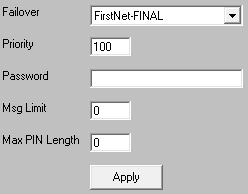
6)Click Apply
Step 4: Create Recipients tied to the FirstNet-PRIMARY method of delivery
1) Right click Recipients, select Add.

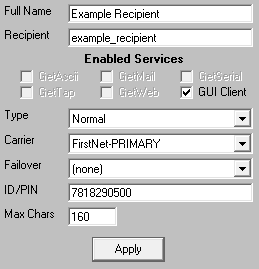
2)Specify the following:
Full Name: The name of the recipient Recipient: This field will automatically populate but can be edited and may ONLY contain alphanumeric characters, underscores and dashes.
Type: Normal Carrier: FirstNet-PRIMARY Failover: See Failover Scenarios ID/PIN: 10 digit cell phone number
Max Chars: Specify the number of characters you want the ability to send to this recipient. If this value is higher than the carrier's "Max Chars" value, PageGate will break up long messages in to multiple blocks. |
|
3)Click Apply.